You have a running Windows XP system on an "old" Intel-based processor, Pentium 4, e.g., and you get a new computer with an AMD-based processor, an Athlon64X2 4800+, in my case. Switching the hard disks from one machine to the other is easy, of course, yet the system doesn't boot ... due to
- different hardware access layers (HAL)
- different hard disk (SATA) controllers
- different CPUs
- possibly more reasons.
But, there are solutions for everything ... even though MS says it's not possible (at least, they say it is impossible to switch CPU types when using sysprep, see here).
Step 1: Backup
Save all important data. You never know what is going to happen.
Step 2: Remove Drive Letter Assignments
If you don't want to move the harddisk, but copy it instead onto another one, you need to remove all drive letter assigments. Otherwise, if your C: system is copied onto a G: drive, you will end up with a G: drive on the new system ... which does not really work.
See "Forking a XP-installation": Remove all entries from the registry-key "HKEY_LOCAL_MACHINE\SYSTEM\MountedDevices"
If you use the copying approach, some more steps are necessary, especially making the hard disk bootable by makeing a rescue boot, and executing fixmbr and fixboot sucessfully. Also, the copying itself needs to be done on a third(!) system.
Step 4: Disable intelppm.sys and/or processr.sys
There are two system services that are left untouched by Windows XP when doing a repair as we are going to do below, both responsible for Intel processors -- microcode loading, etc. Thus, either
- disable them before shutting the old system down for the last time (services.msc, "Disable")
- Boot your windows XP CD into rescue console mode, and execute "disable intelppm" and/or "disable processr" (use "listsvc" for listing the services). This can also be done between steps 5 and 6, if necessary.
Thanks to Ben Armstrong from the Virtual PC Team for this information; also see here.
Step 5: Repair the system
Use the XP CD to boot, select "Install", then, "Repair". Makes a clean installation of the system, yet keeps all software, user etc. settings, programs and data. This is the main reason for doing this in the beginning, instead of a clean install.
Make sure you have a XP CD with Service Pack 2, to avoid both the trouble of reinstalling it, and any unexpected pre-SP2-behaviour ...
Information about this repair can be found, e.g., here.
If you skip this step and just boot the old system on the new machine, you get a blue screen of death (BSOD) -- usually "inaccessible boot device", also here or here.
Step 6: Boot the half-installed system
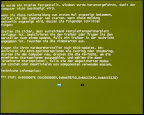
Part of the repair process, as any other windows install process, is a reboot. If the reboot fails with a blue screen (of death, BSOD), or a green screen (yes, really, see figure), you need to do step 4 ("disable intelppm"):
STOP: 0x0000007E (0xC0000005, 0xBAA28750, 0xBACC342C, 0xBACC3128)
Apart from this, you need to finish the installation, including new hardware drivers (they'll have changed, anyway), and similar stuff. You should have a running system, now; otherwise, contact me with detailed questions ;-)
Step 7: Patch the system
Last thing to do: install the current MS patches. You overwrote all system files, so you are back to SP2 state ... that means about 50 patches, currently.
Step n: Have fun.
As much fun as one can have with a windows system ....Appendix A
As I found out later (12th March 2008), it is possible to copy the "repair" registry into into a non-booting system via the repair console (booted from CD). This is usually the first step on the way to manually copying the least recent registry from a system restore point. On the other hand, it is possible to copy c:\windows\repair\system into c:\windows\config\system, thus replacing the system registry only, while keeping the rest of it, and forcing hardware re-detection on the next boot
Unfortunately, this did not really work out on the one time we tried it ... the system booted, yet the second the mouse cursor appeared it re-booted.
On the other hand -- if you have a system that windows is not willing to repair because it is simply not detected by the boot CD for the "repair-install", doing this surprisingly makes the CD rediscover the installation ... no idea why it wasn't found in the first place, yet it helped. Go back to Step 1, then.
Appendix B
After the finished the install on the new hardware, the installation still contains the information about all the old hardware ... from on-board network devices via ACPI to mainboard resources. There is trick to make the hardware configuration panel to show "non-available" devices, though, and delete the ones you surely never need again. The non-available ones have "lighter" icons.
- start a cmd shell
set devmgr_show_nonpresent_devices=1devmgmt.msc
Just don't delete anything you might need again, and rather keep the USB stuff ... also, do not delete any IDE channels, as the ones where no drive is attached, are shown as missing as well.
No comments:
Post a Comment